Setting Up Your Workspace
To create and manage documents in InDesign (and other Adobe Creative Cloud applications), you can use various elements, such as panels, bars, and windows. Any arrangement of these elements is called a workspace. You can customize them to suit your workflow by selecting preset options or creating your own.
Customize your workspace in InDesign
Recommended Workflow + Panels
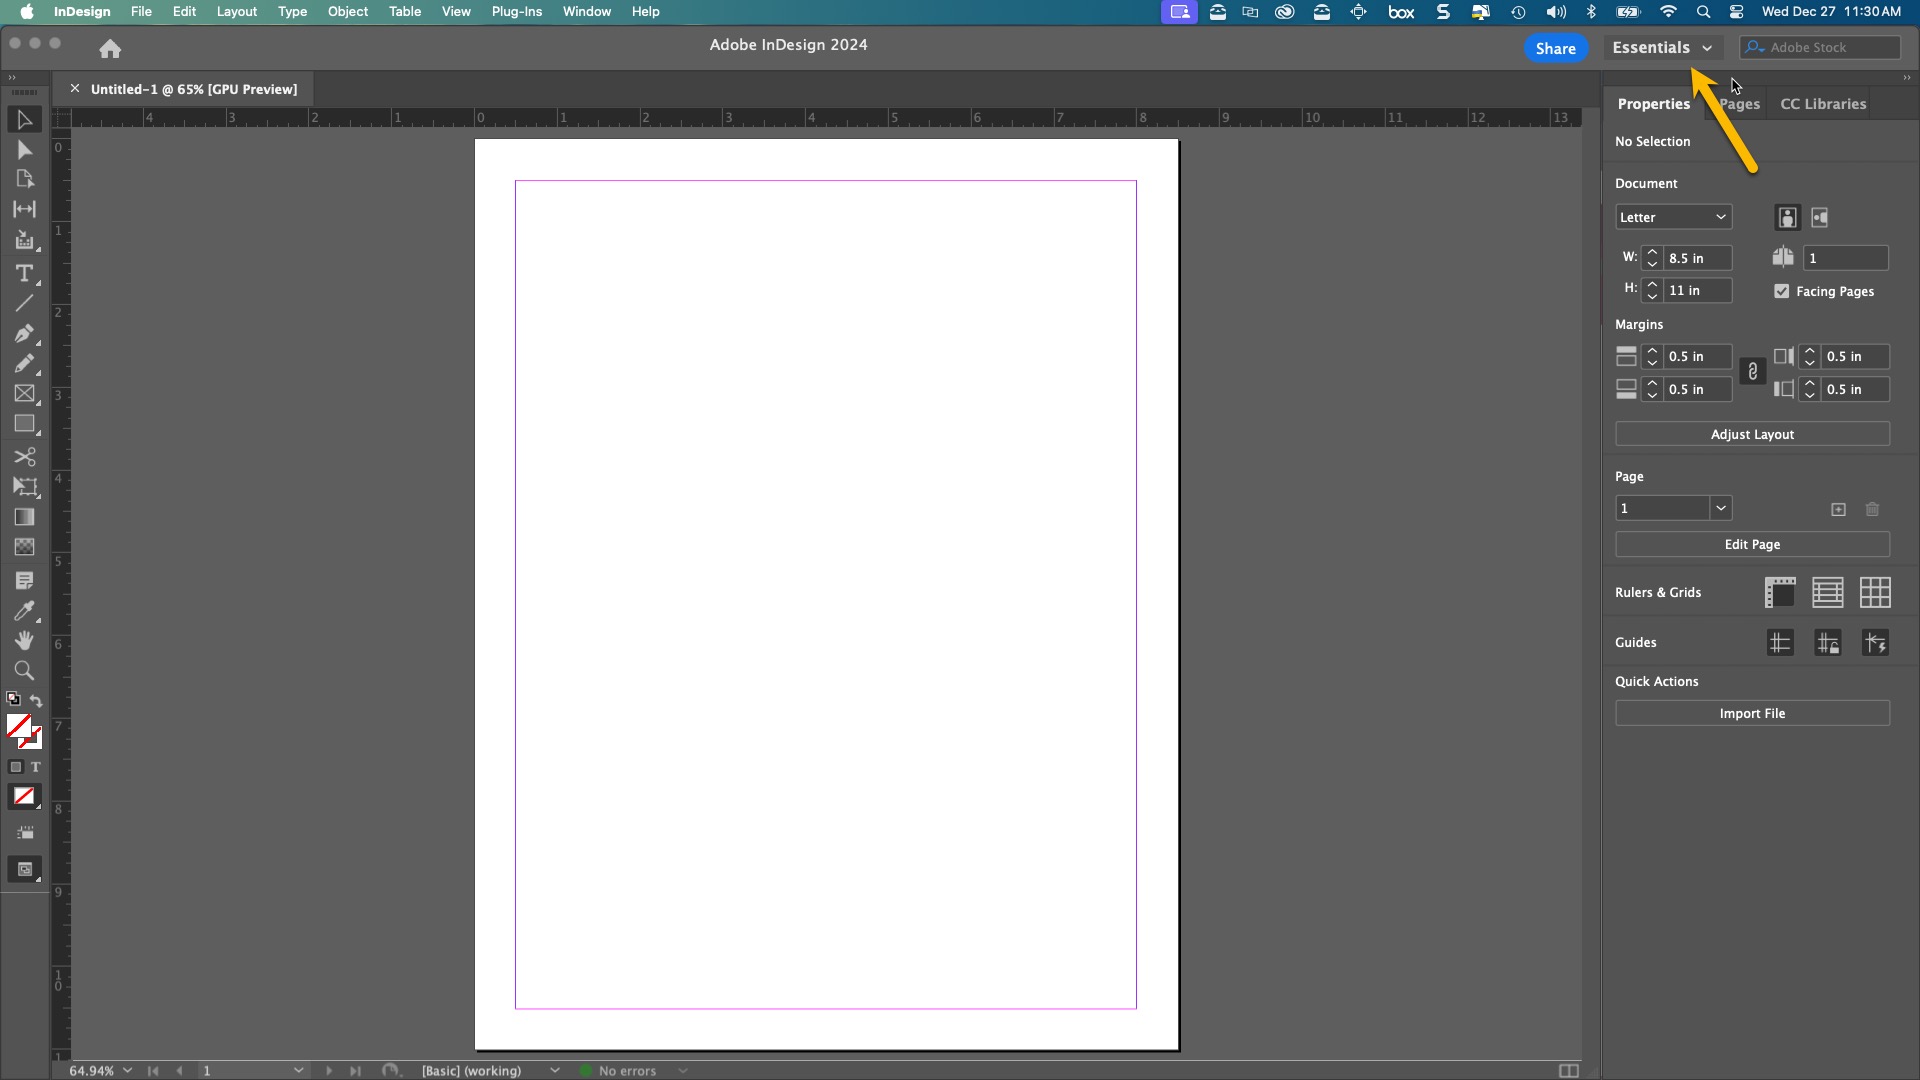
When you open InDesign for the first time, it will default to the Essentials workspace, which looks like this:
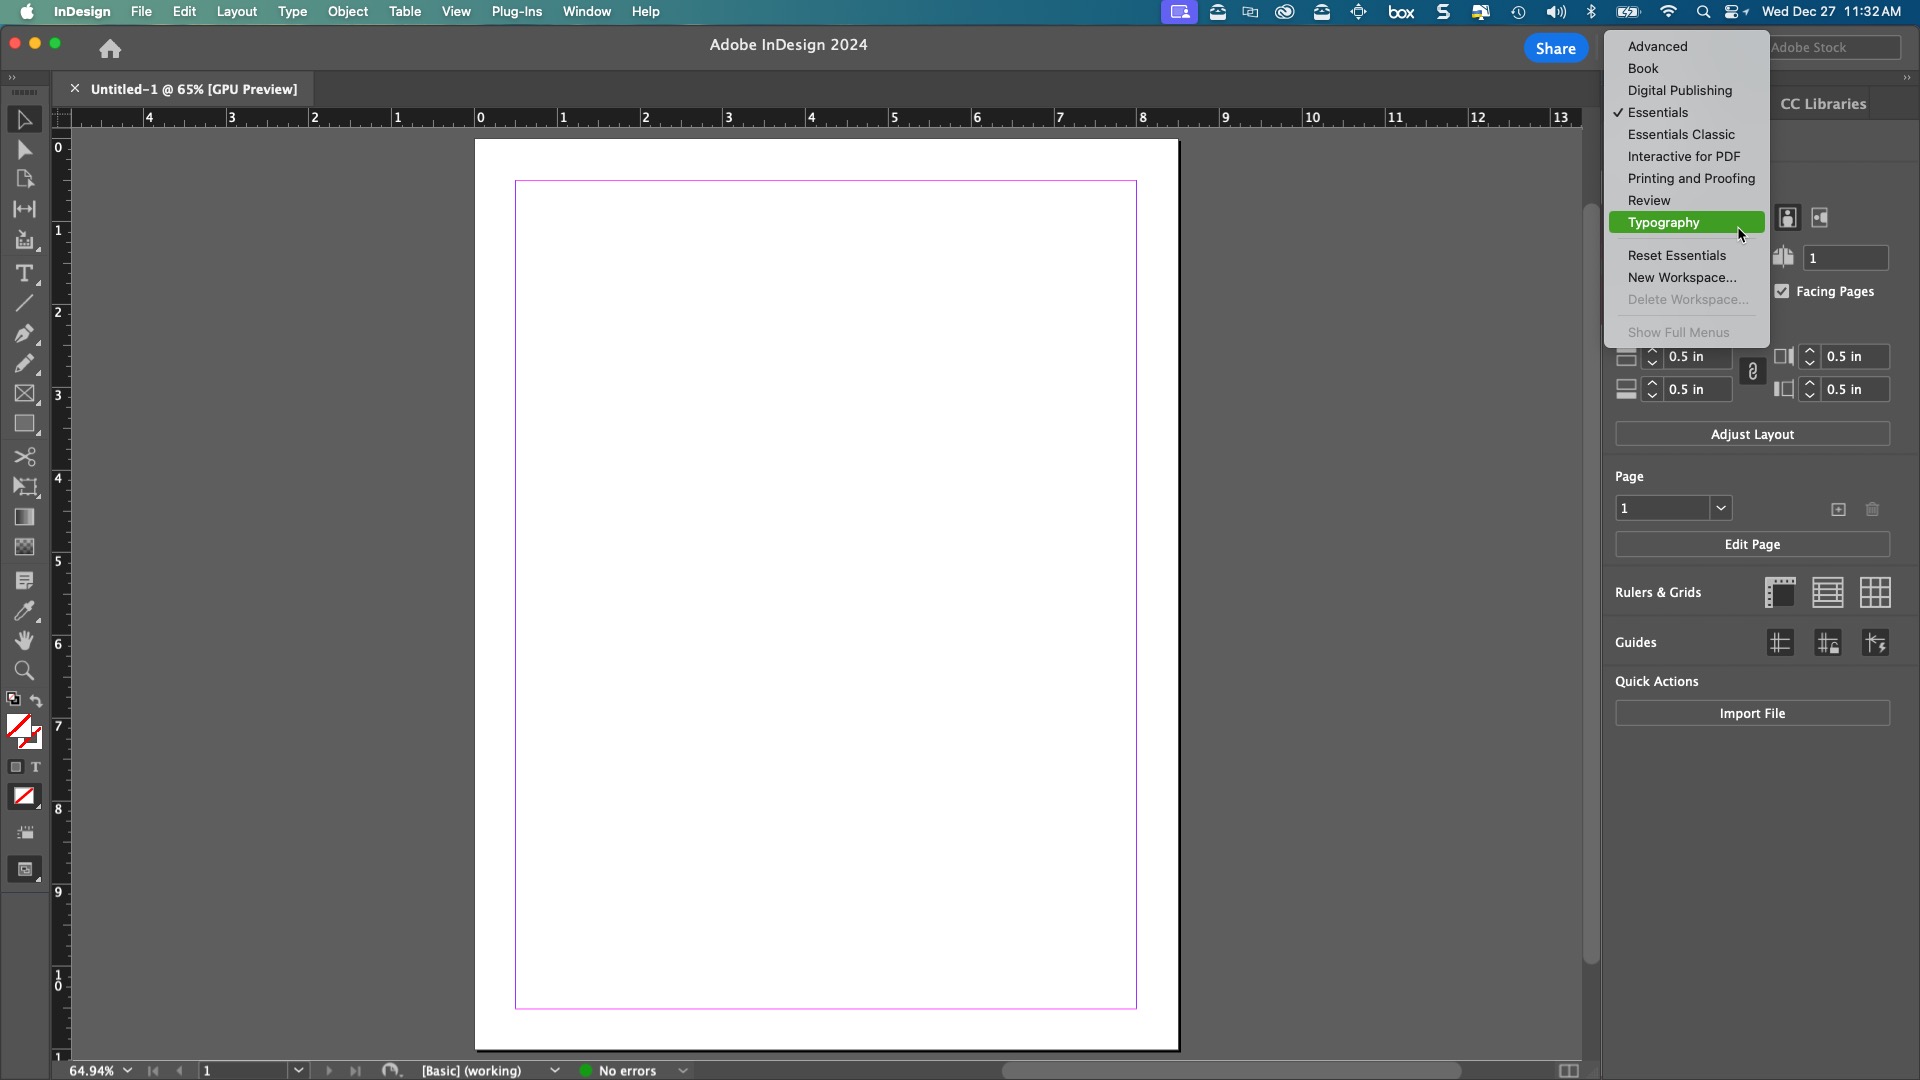
Click the arrow next to "Essentials" and select "Typography."
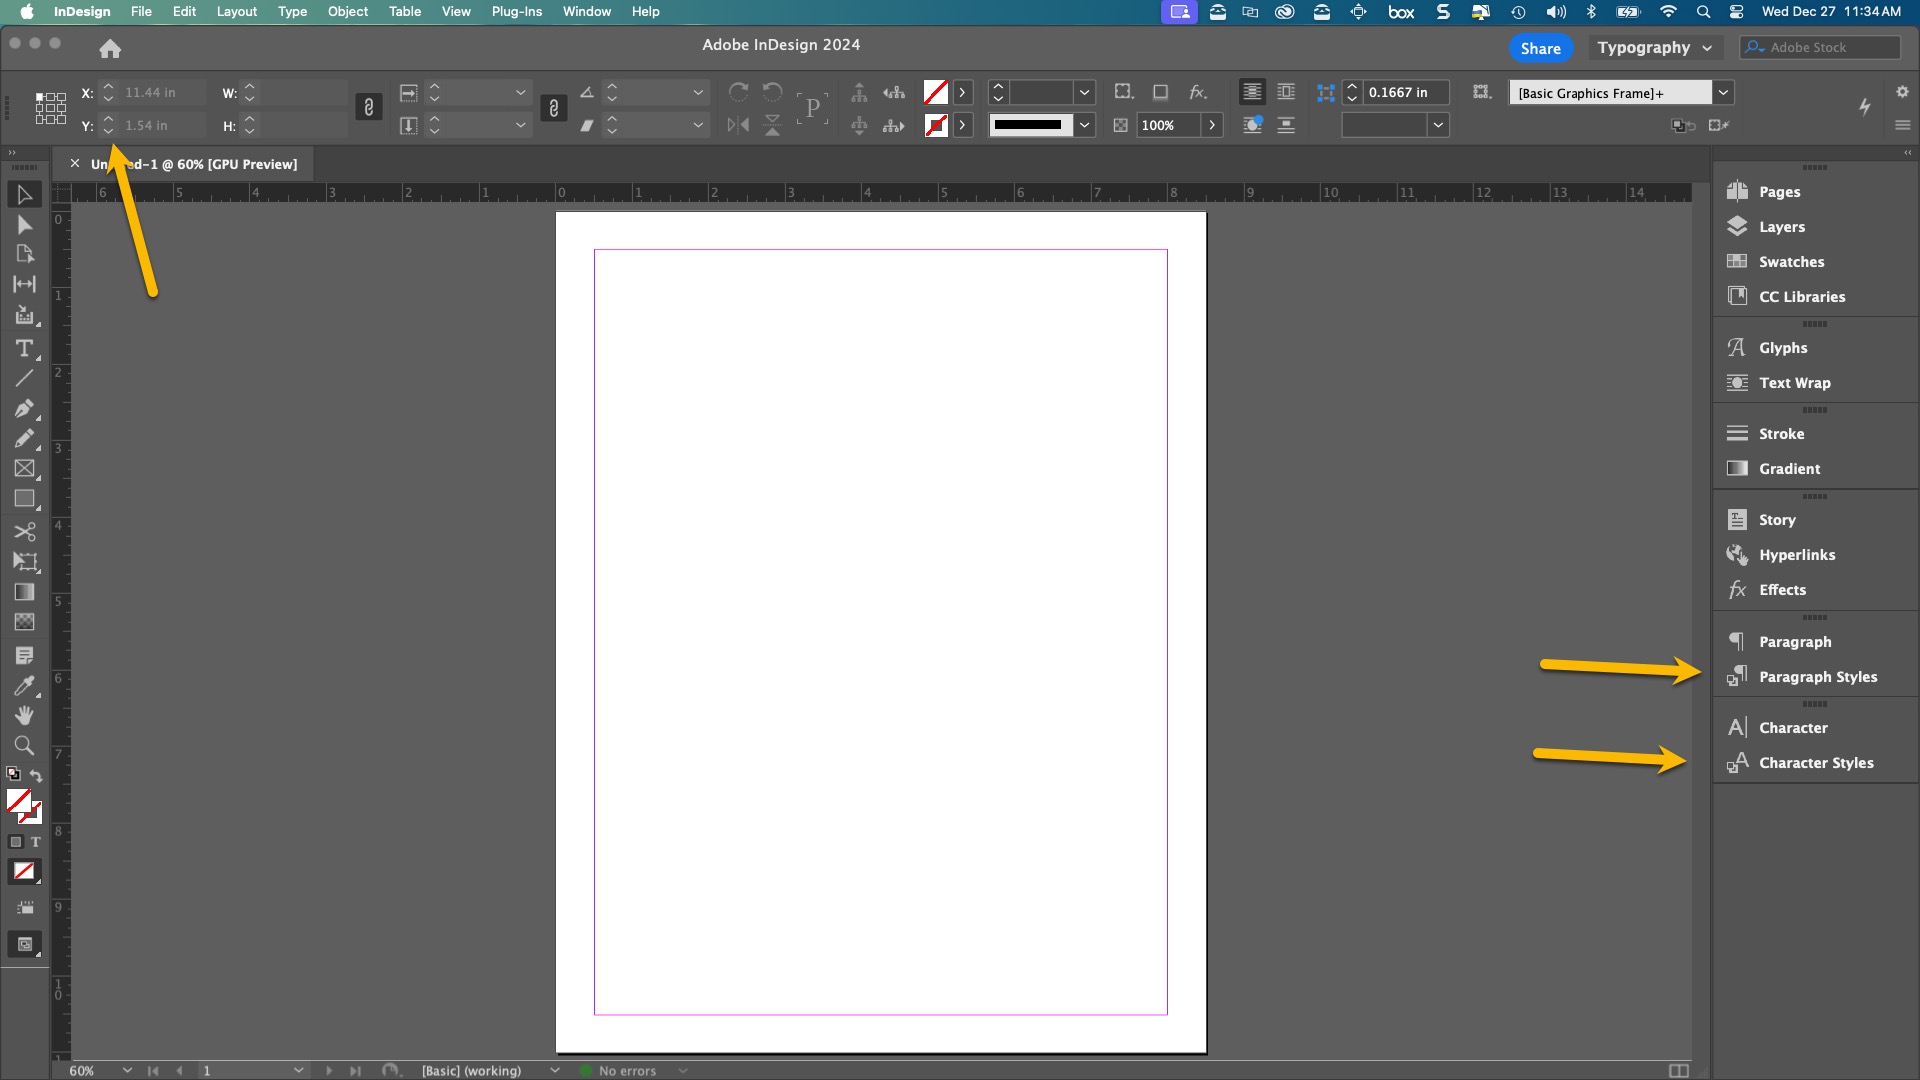
Since most edits to DORIS docs will be to text, the Typography workspace is a good start. It includes Character Styles, Paragraph Styles, and the Control bar across the top, which is an easy place to access font properties.
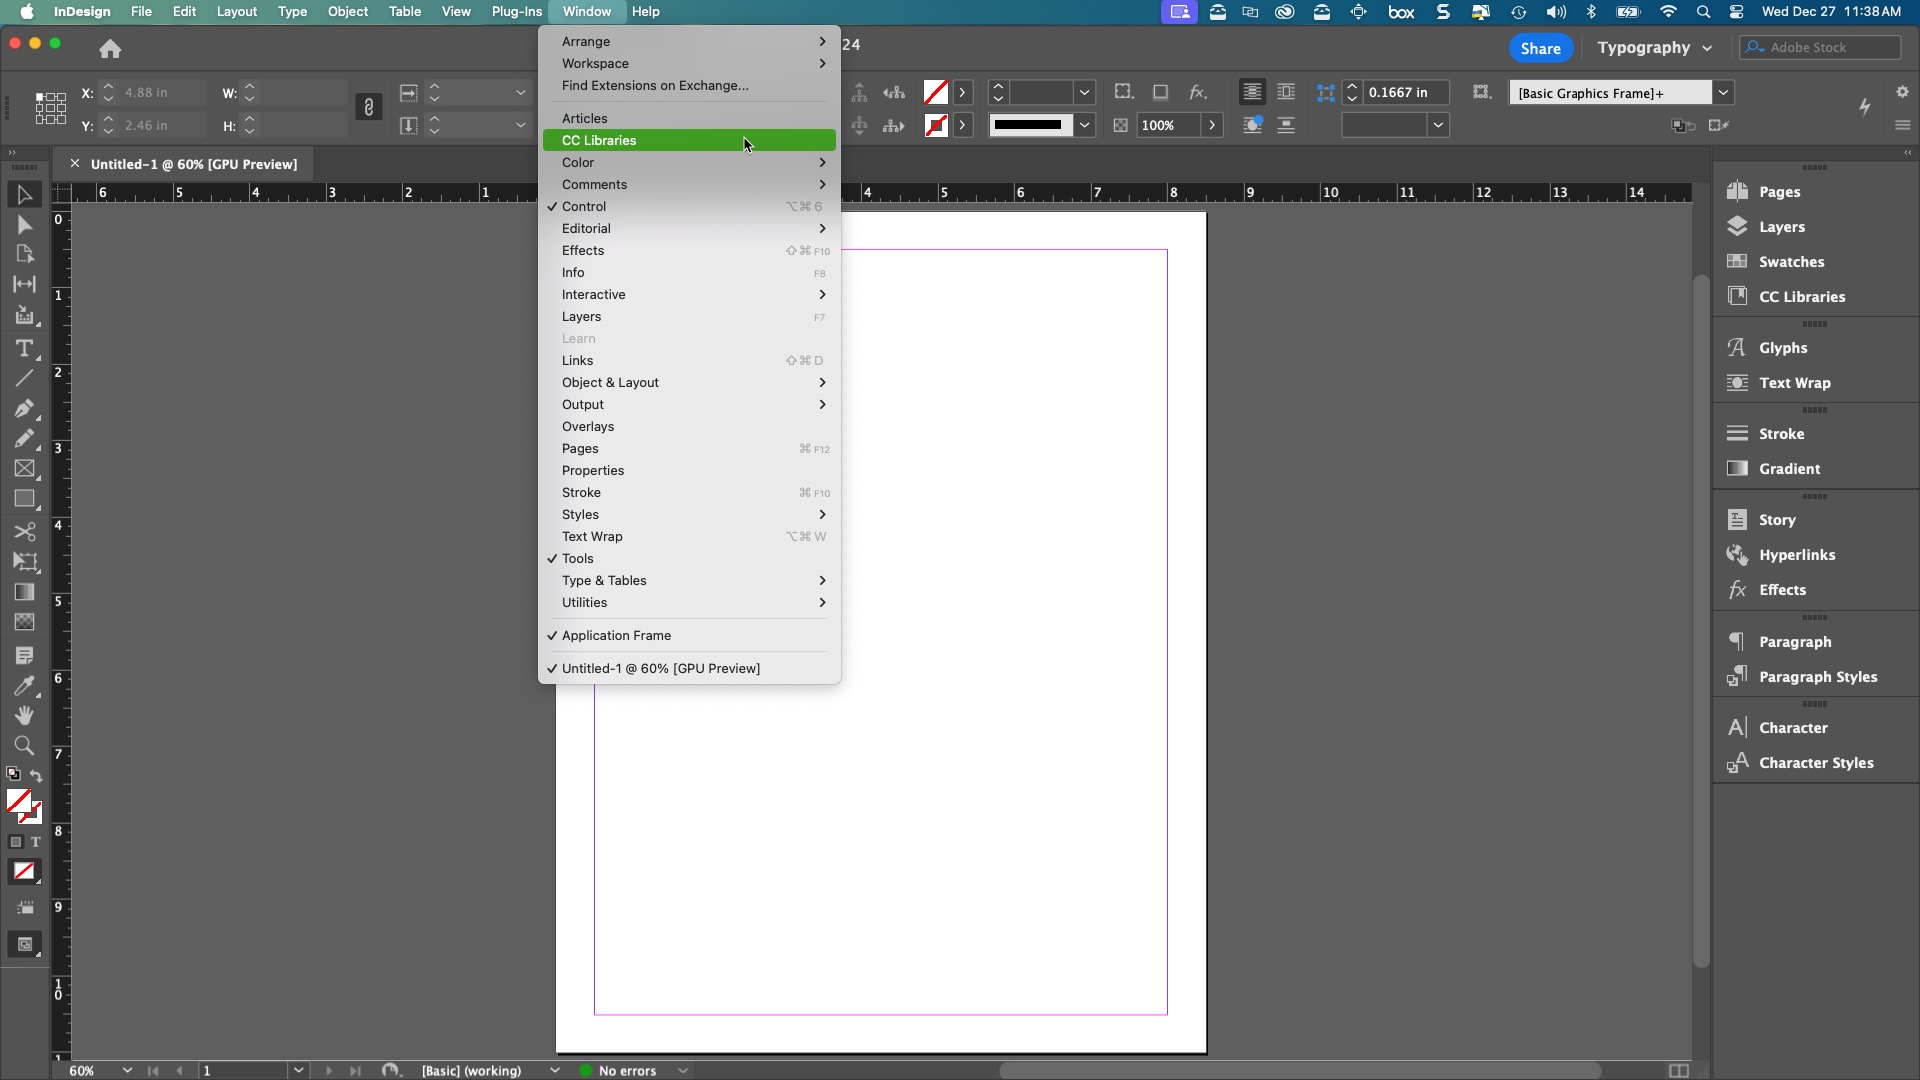
DORIS recommends you add a few more panels from the Window menu:
- Links
- Object & Layout > Align
- Styles > Object Styles
These functions are used heavily in DORIS documents, and it will be helpful to have them handy.
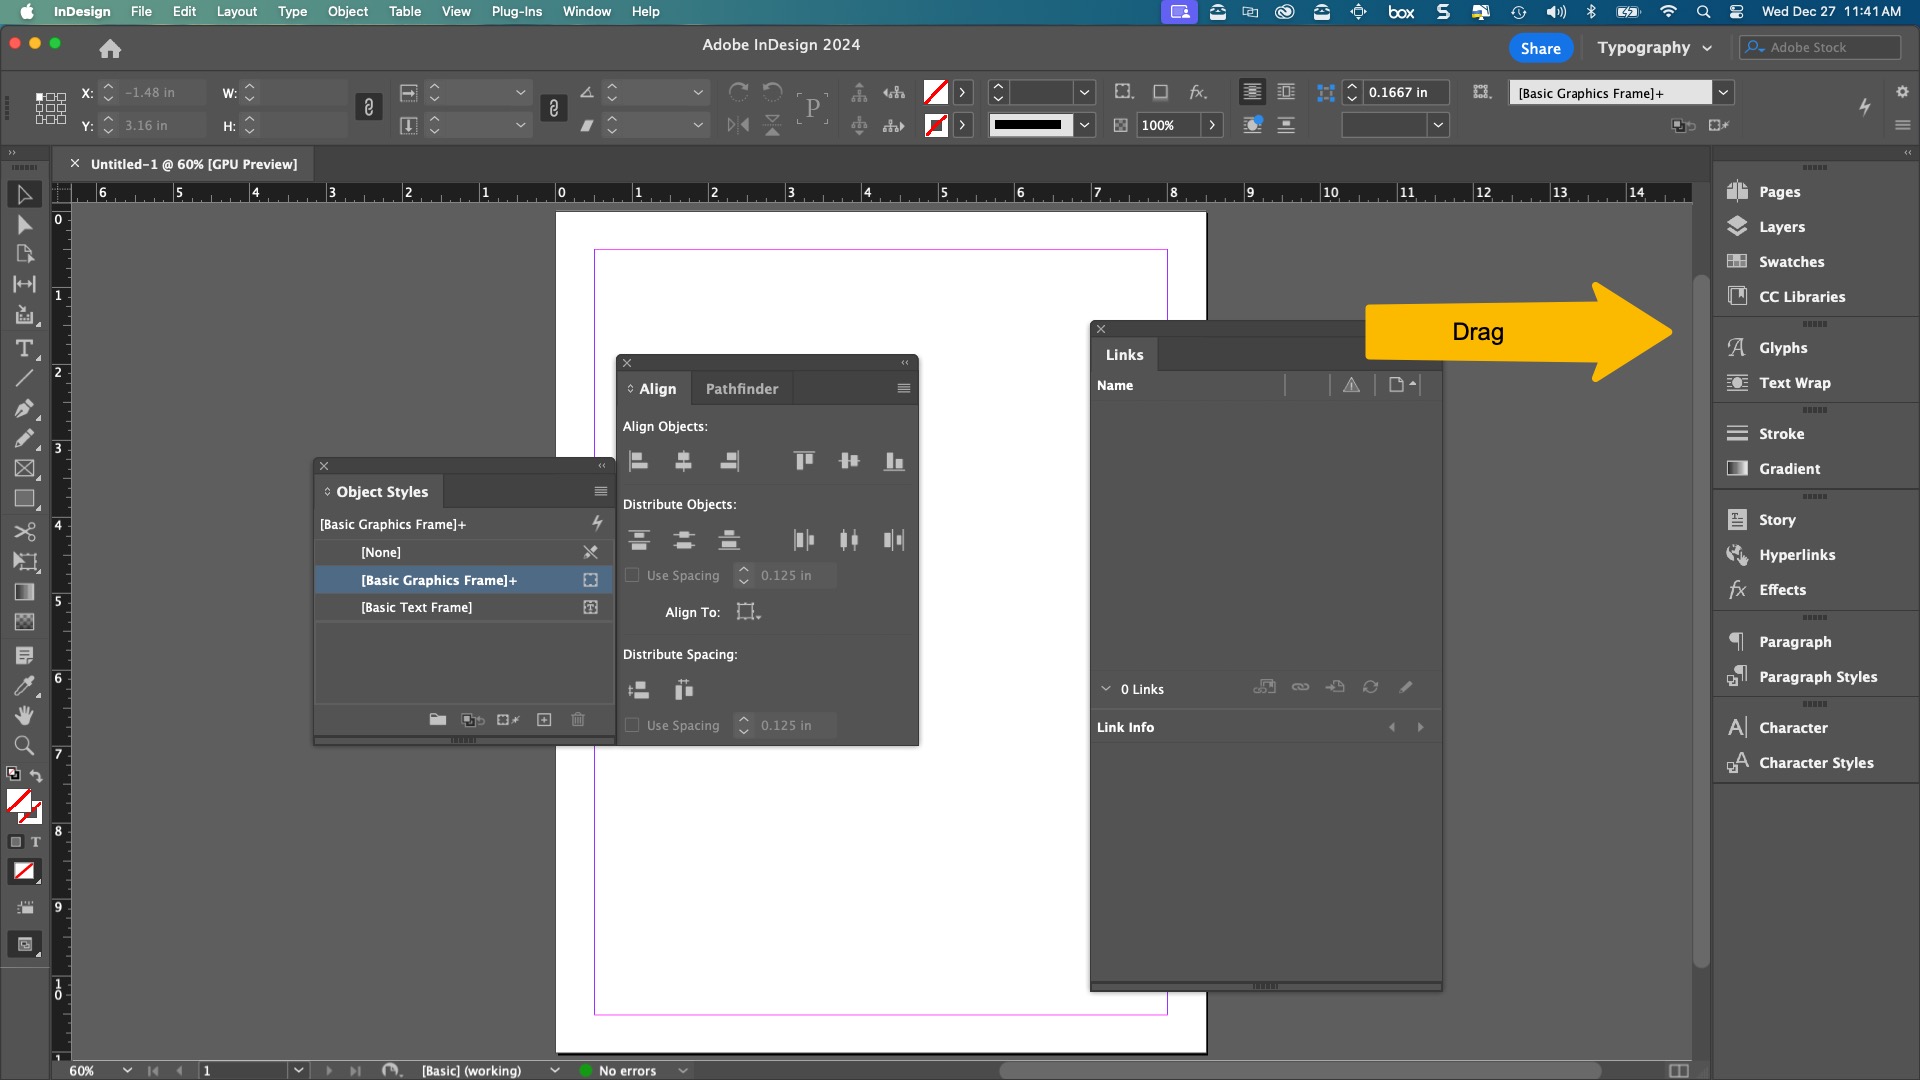
InDesign will add free-floating floating panels to your screen. Grab each and drag it over to the right menu.
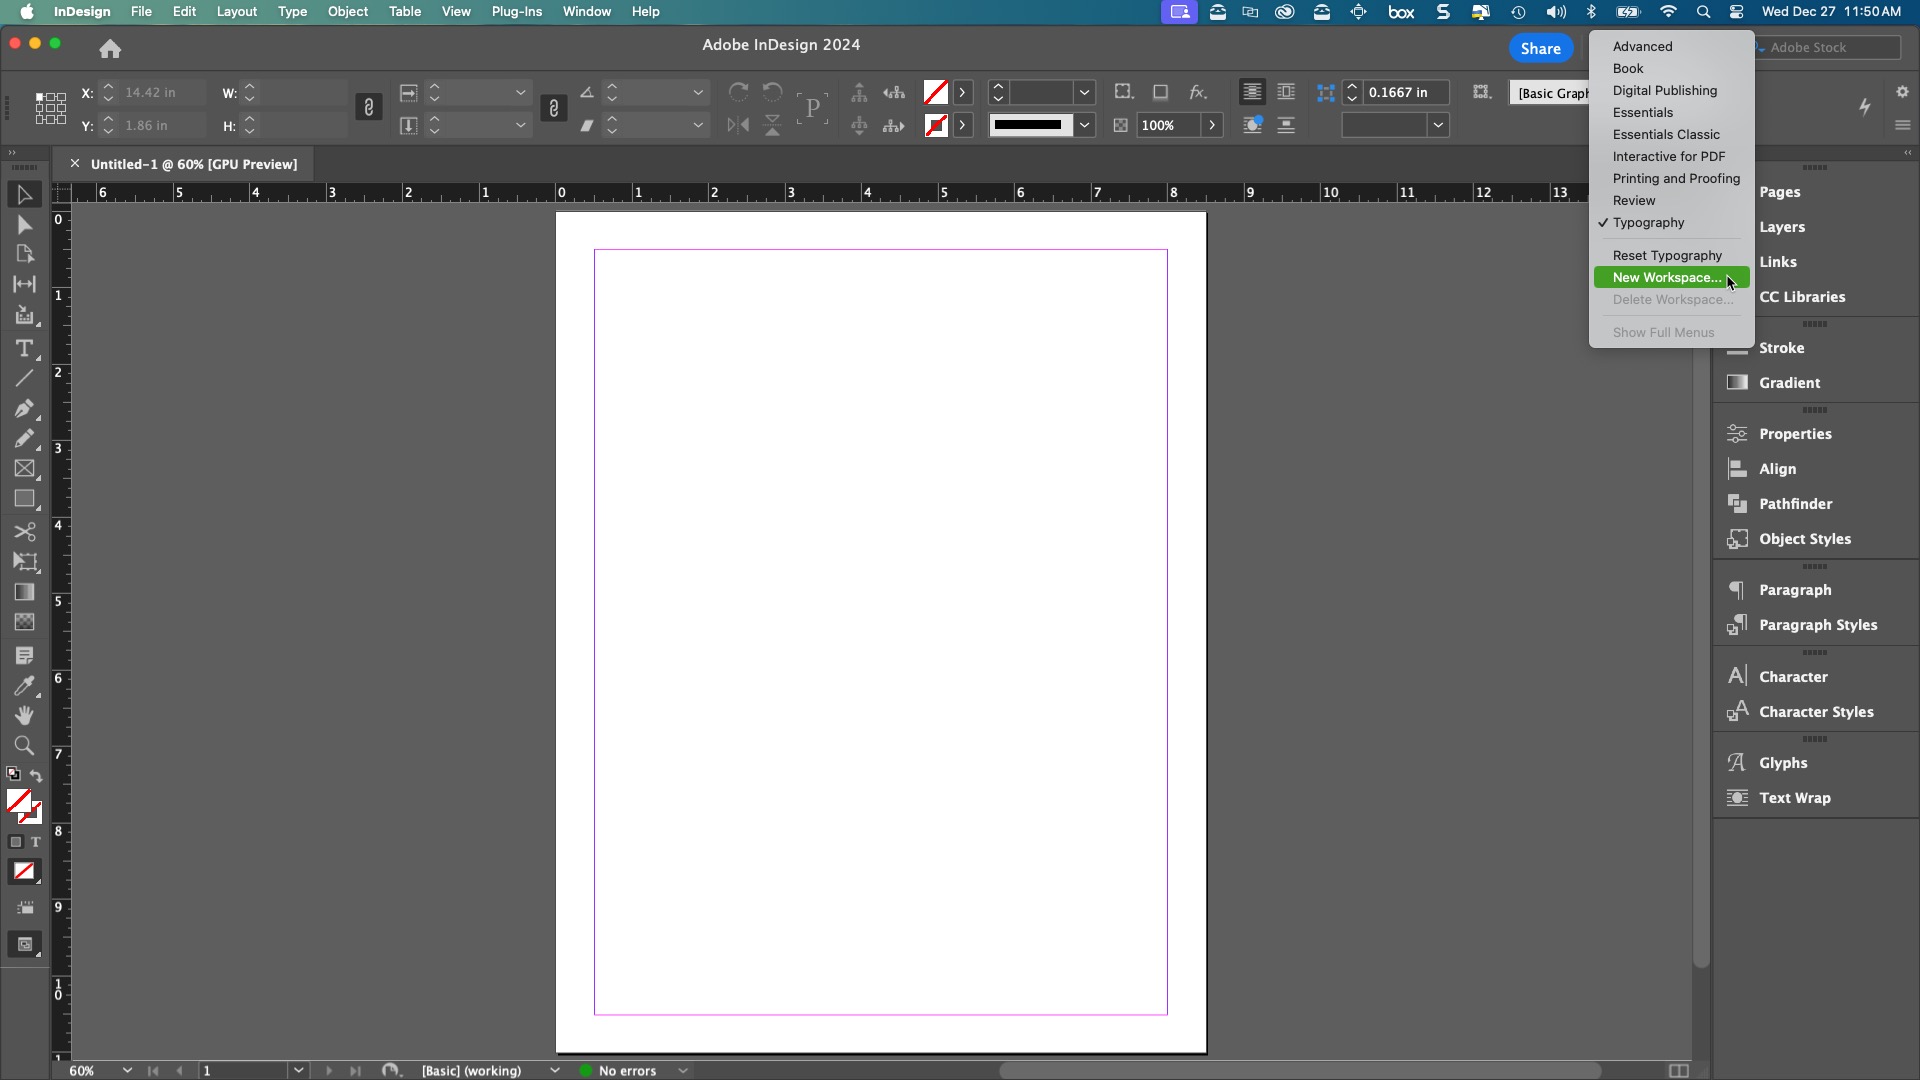
You can add, remove, or rearrange these panels however you wish. InDesign will remember your workspace setup, or you can save it as a preset. Once you have your workspace set how you want it, click the arrow next to "Typography" at the top right of the screen, select "New Workspace," and give it a name.
No comments to display
No comments to display